Tag Archives: home improvement

How to Budget and Plan for a Major Home Renovation

House Signs

A home renovation is one of the more stressful ordeals you can go through in your life, even if you’ve done it before. It’s uncomfortable while it lasts, it can get messy if you don’t pay attention, and last but definitely not least, it can hit your bank account hard. Planning ahead can mitigate all of those factors, especially the last one – and it’s a good idea to take the time to sit down and come up with a proper plan of action if you don’t want to get caught up in a complicated situation.

Start Early

A major home renovation is not something you can plan a few days ahead of the job. This should go without saying – and yet you’d be surprised how many people put very little thought and planning into their own renovation jobs. As a result, they end up paying significantly more. There are many factors that play into this. Purchasing supplies and materials early can allow you to scout out good discounts and hundreds of deals for them. Contractors have their own schedules and contacting someone for a short-notice job is going to be more expensive. You can plan around the seasonal weather changes as well. In the end, giving yourself at least a few months – ideally half a year – before you start with the actual work is going to be very beneficial.

Extending Your Budget

After you’ve drawn the bottom line, you might come to the unpleasant realization that your budget is not actually enough to cover everything you want to do. Taking out a loan is perfectly reasonable in this situation. Just make sure that you know how you’re going to repay it, and how it will impact your budget. As long as you have a good credit score, it should be possible to get a nice extra stretch on your available funds without having to go through any uncomfortable periods later on.

Why the DIY Approach Can Be More Expensive

A big mistake you can make is to think that you’re just going to roll up your sleeves and get the job done yourself. Or at least parts of it. The problem with this is that while it may indeed save you some money in the short-term, it will very likely increase the overall cost of your project in other, unexpected ways. You will have to spend much more time on each part of the job compared to the average contractor, and you’ll also make more mistakes than them, costing you even more time and materials. Spare yourself the trouble and leave the complicated tasks in the hands of professionals.

Going Green Can Be a Money-Saver in the Long Run

As long as you’re renovating your home, now might be a good time to think about changing your approach to a greener one. This can cost a bit more in the immediate term, sure, but its impact on your budget can be significant in the long run. With a home that’s insulated better and at least partly self-sustaining in terms of energy and heating, you’ll knock off a large percentage from many of your bills. You’ll be better prepared for tomorrow too, as many of these things will likely become beneficial factors for your tax return sooner or later.

It doesn’t have to cost a great deal of money to renovate your home, at least if you give yourself enough time for the job and know what caveats to expect along the way. All things considered, it’s very likely to go smoother than you’re anticipating, and will probably not even cost you that much.

This is a collaborative guest post. The views and ideals expressed do not necessarily represent those of Mommy Ramblings.


3 Comments

Filed under Home & Garden, Home Improvement, Life

5 Helpful Painting Tips To Paint Like A Pro

Winter is a good time to tackle some indoor home improvement projects. You would be surprised at what a fresh coat of paint can do to chase the doldrums of winter away. So, if you are ready to freshen up your walls, check out these 5 helpful painting tips to help you paint like a pro. 

Safety First:

Protect your eyes from paint drips or flying debris with a pair of plastic safety glasses or goggles. Make sure your room is adequately ventilated and if you are using any product with strong fumes, wear a respirator.

Prep First:

No matter how excited you are to get that color on the walls, you cannot skip the prep. Check your walls for cracks, holes, dents, stains or other imperfections.  For most issues, a lightweight spackling compound and putty knife will be all you need. Just apply the compound and remove the excess. Allow the area to fully dry then sand lightly until the area is smooth and uniform with the rest of the wall.

Remove dirt and debris by washing down the walls. Remove all outlet covers, pictures, hooks, nails etc. Remove as much furniture and belongings as possible. Having a clear space will make painting much easier. Using a painter’s masking tape, tape the room to prevent paint getting on the molding. Cover the floors with drop cloths.

Use Primer:

Primers are developed to help seal your walls, prevent mold and stains and can even be tinted to the color of the paint you are using. Since primer is less expensive than paint, using a tinted primer means you won’t need as many coats of paint  and that will save you money. You can buy a paint and primer in one too, but when you are painting on new drywall, you will want to use a primer first no matter what type of paint you are using.

Cut In:

Start by cutting in with the primer or paint/primer. You want to cut in where the ceiling meets the wall, around windows and doors and where the walls meet the baseboard. It is best to do this one wall at a time. You should cut in and paint the wall and then move on to the next for the best looking results.

Load your roller and start at the top, roll a W or a V shape over a section of the wall and continue until the sections is covered. Then move on to the next, reloading your roller as needed. Allow ample time for the first coat to dry before accessing if you need a second coat.

Clean Up:

Remove the painter’s tape, if left on too long it can become difficult to remove. Clean paint brushes, rollers and roller trays per manufacturer’s instructions. Tightly seal paint cans. Before putting outlet covers back on you can put a piece of masking tape to the back and write what paint color you used on it.

I hope this post inspired you to take on those dingy walls in your home. There are so many color options out there and even if you are not ready for a big color change, you could do one accent wall to make the room pop. Let me know if these tips helped you and tell me all about your project in the comments. Happy painting!


1 Comment

Filed under Home, Home & Garden, Home Improvement

You’ll Never Believe What You Can Do With Reclaimed Wood

Using wood and other natural materials, is huge in interior decor this fall. It’s with good reason, too. Wood finishes are the perfect way to bring the look of any interior design concept together as well as, adding a personal touch to the family home.

Wood finishes add a sense of warmth, richness and comfort to whatever colors, finishes and materials they’re paired with. The sheer range of woods available makes this material extremely versatile. Pale ash, for example can give a room a fresh yet neutral tone, while a deep mahogany adds warmth and prestige to any living space and oak is perfect for more or less anything.

While many of us love to use wood in our interior design, few are aware of the benefits of reclaimed wood. Just go ahead and look at Plank and Mill’s website and you’ll see the distinctive finish that reclaimed wood has, as well as its enormous variety of applications. Using reclaimed wood is not only good for the environment but is also perfect for a wide range of interior uses, including…

Headboards

The bedroom should be a restful, tranquil place decorated with neutral tones and unimposing natural materials. Thus, a reclaimed wood headboard can be a subtle yet distinctive addition to the bedroom. The type of wood you choose to use will depend on the overall aesthetic of your room and the other tones and types of wood already present in your bedroom furniture.  For example, a headboard made of reclaimed driftwood can strike the difficult balance between making a statement and compromising the soothing neutrality of the room.


Feature walls

Every now and then you’ll want to call attention to a particular wall and neither paint nor wallpaper will quite cut it. For an accent or feature wall that’s little more distinctive, reclaimed wood creates a pleasing contrast with paler tones elsewhere in the room. It’s important to remember that wood has a tendency to absorb light, so it’s best utilized in spaces where the furniture and decor is light and airy. Wooden feature walls can be dressed up or down, recreating either a rustic log cabin feel or a more sleek, contemporary look. While versatile, reclaimed wood is, of course, unique meaning that your reclaimed wall will look like no other anywhere in the world.

Dining tables

If you’re looking for something truly unique, a dining table made of reclaimed wood is a wonderfully distinctive piece of furniture that doubles as a fun conversation piece among dinner guests. The great thing is that you’ll never need another dining table as the look of the finish will change subtly with age. While a reclaimed wood dining table is seldom cheap, it may well be the last one you ever buy.

Flooring

If you’re aiming for a rural, country effect, distressed reclaimed wood will look (and feel) fantastic under your feet. However, if your tastes lean towards the classic and elegant, a darker tone will give the room warmth and grandeur while subtly complementing any antique furniture you may have in the room.

This is a sponsored post that may or may not represent the views and ideals of Mommy Ramblings. Photo Credit-Plank and Mill’s website


2 Comments

Filed under DIY, Home & Garden, sponsored guest post

I Think I Found My Backsplash…Well, Maybe, Please Help Me!

I think I am going batty trying to pick out backsplash tile for my new kitchen. I am closer than ever to making a decision. I am however, a bit confused on some of the components. I had given up on trying to find a cream subway tile. Every time I found something there was no coordinating trim to do what I wanted. I brought home a piece of beveled white subway tile and it didn’t look too bad with my countertops.

You can imagine my surprise when, after giving up on finding cream, and picking everything in white, I found out I could get it all in a royal cream color. Shopping for tile is very confusing. So, now I am going with cream. I mean, I think I am going with the cream, lol.

I like a 3″ by 6″ subway tile that is beveled, and glossy.

I don’t need much bullnose or trim pieces in my kitchen. I only need two small pieces where the tile comes up on the sides of the sink on either side of the window. I plan to top it with this piece of crown trim.

Gloss Cream Crown Molding 2.25″ by 12″

The other area I need a trim piece is on the side near my french sliding doors. I am not sure which trim piece to go with there, but there are a variety of trim pieces available. I will check with the installers, on what they think would look best. Here are some of the choices beyond the piece above. I know the colors don’t all look the same, but that is not accurate, they are all the same brand and same color.

Bead Wall Tile Trim 1″ by 6″


Bullnose 2″ by 6″


Bullnose Long Side Trim Tile 3″ by 6″

Bullnose Short Side Trim  3″ by 6″

1/2″ by 6″ Tile Trim

Dome Trim 12″ by 3/4″

Okay, at least there is an abundance of trim, the only thing they do not have, is the double bullnose corner piece. It is however available if I go with the white. I am not sure that it is necessary, but if it is, that will be my sign to go with the white, lol.

So now for the special accent behind the cooktop. I was inspired by this photo I found online on Pinterest or Google Images, I cannot even remember, I have looked at so many.

So, this brand also has a 4.5″ by 4.5″ tile that I could use in this design.

4.5″ by 4.5″ Square Tile

I would use the crown trim for the frame.

Crown Molding in Royal Cream 12 in. x 2-1/4 in.


The part I am stuck on is what color to use for the mosaics for the border and for the deco between the square tiles. Some that I think would be good are:


Natural Seashell Mosaic


Honey Polished Onyx Mosaic

White Natural Seashell Mosaic ( I think this may be too light to be an accent.)


Mini Tundra Glass and Stone Mosaic

My countertops are Cambria Quartz in Nevern.

My cabinets are Wood Mode in Vintage Bright White.

Ugh, as I am writing this, I am not thinking maybe I should go with the white. The cream is not a beige but really a bone that my kitchen designer said would look good. I am so conflicted. lol Here is the white:

White Beveled 3″ by 6″ Subway Tile

And a close up of it:

Close Up of White Subway Tile

And now the Royal Cream close up:

Royal Cream Close Up

My cabinets are not a bright white they have a glaze that makes them vintage, and more of a creamy white.

So, what are your thoughts on this? I really would love to hear, this has been the hardest decision of the entire kitchen project.


Leave a Comment

Filed under Home & Garden, Home Improvement

Part 2 of our Kitchen Transformation

If you have not seen Part 1 of our Kitchen Transformation click HERE.  You can also see our video constructions updates for a more in-depth, up close and personal look at everything, including the lessons we learned along the way.

So, the was the first piece of quartz installed. Sorry for the poor lighting, they still had not installed all the lights at this point. Also, outside the kitchen window is a temporary storage shed that will be moved, once we can move our stuff back in.

There will be a false drawer front that matches the cabinets surrounding the farmhouse sink. It is still being made in the factory, but we will show you what a difference it makes when installed. Again, the shed in the back is just temporary.

That is my plumber checking out the island top. I noticed after they left it was not even so they had to come back and redo that and the sink. Fun times.

The opening for the cooktop is cut on site. They bring in a fan that sucks out the dust and through an attached large tunnel tube it is blown outside. They also have a vacuum running.

Once the sinks had set, the faucets were installed along with the dishwasher and cooktop. We also installed the 3 pendant lights over the island and the one over the sink.  Then, the rest of the cabinets could be installed.

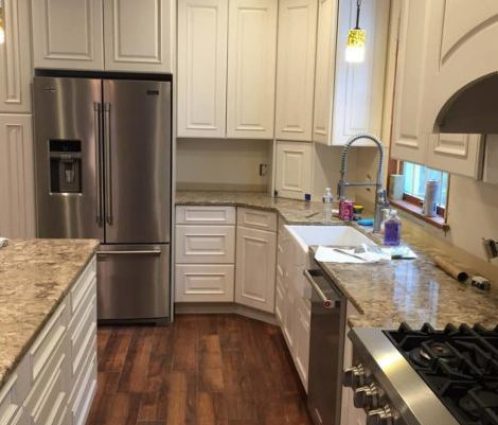
We need to get the crown molding installed on top of the cabinets and most of the interior cabinet lighting as well as the under cabinet and upper cabinet lighting. The cabinets still need to be aligned and the hardware installed. My biggest problem is, I cannot find a backsplash tile I like. Hope to do that this weekend. We have some more work to do but we have come a long way.


6 Comments

Filed under Curb Appeal, Home, Home & Garden, Home Improvement

Our Kitchen Transformation

So, if you don’t follow us on YouTube you might have missed all the construction updates on our house. If you would like to catch up, you can go to the Construction Update Playlist. In those videos, I share all the goofs, mishaps, mistakes and problems we encountered along the way. Here are some photos to show you where we started and how far we have come.

This was the kitchen before as is, it was a mess when I took these photos because we were in the middle of moving out.

This was during the demo of the kitchen, after the tile floor was removed.

The soffits were coming down, so they had to rip them out. We found a surprise under them.

That pipe near the window was our surprise. At first they thought it was a waste line from the upstairs bathroom that could not be moved, but they found out it was not, and we were able to move it!

Some new electric lines were installed and then they started putting the new insulation in. The recessed lighting also was moved.

Next, the sheet rock was put up and spackled.

Then they had to paint. They installed Hardibacker Board in preparation for the tile.

Next the tile floors needed to go in.

After the tile was in and grouted, our Wood-Mode Cabinets were delivered.

We protected our floors with a Red Rosin paper that is used as an underlayment for wood flooring

There were a lot of cabinets, moldings and trim delivered.

These were the first cabinets installed.

The new ovens were ready to be installed.


We had to wait to install the upper cabinets on the other side until the template was done for the quartz countertops because the cabinet in the corner sits on the countertop.

That is the end of this update, be sure to check out Part 2 of our Kitchen Transformation and Picking out our backsplash.  If you want to see more check out our YouTube Construction Update Videos.


1 Comment

Filed under Curb Appeal, Home & Garden, Home Improvement

How to Choose a Bathroom Faucet

We are almost ready for our bathroom renovation reveals. When renovating and remodeling, there are so many decisions that need to be made, we talked about choosing the toilet, WASHLET and vanity for the bathroom, but I did not mention the faucet yet. When choosing a faucet there are several things you need to consider.

Faucet Type

First off, if you are updating and keeping the same vanity top and vanity, you are limited to what you can choose. You cannot install a single handle faucet if you have widespread faucet. Well, you can but it will have to have a plate that covers the other holes so you won’t have the same look. If you are starting from scratch, you have all the options you want. I chose a single handle faucet because I like the sleek look and find them easier to clean.

Sink Type

The type of sink you have is also a factor, if you have a vessel sink, make sure you choose a faucet that will work with it. The type of mount and gallons per minute are other things to keep in mind when choosing your faucet.


Finish

The next choice is the finish. Again, if you are not starting from scratch, you need to consider the colors of the other fixtures in the bathroom. We had a clean slate to work with so I went with the brushed nickel.

Style

Next, the hardest part. What style faucet do you want? There are so many styles to choose from! We could not believe all the choices we had in front of us when we were checking out TOTO USA’s website for a bathroom faucet. With so many great styles to choose from, it was hard to decide. In the end, we went with something traditional and elegant. We choose the Guinevere faucet and just had it installed. It is absolutely beautiful.

About Our Faucet

Guinevere as we call her, is more than beautiful, she has a durable brass construction with a ceramic disc cartridge. She has a WaterSense Approved Low-Flow of 1.5 gpm. Guinevere comes in three fabulous finishes: polished chrome, polished nickel and brushed nickel. A metal pop up drain is included.

Our plumber told me that he was very impressed with the faucet. I laughed and told him to handle her carefully and that her name was Guinevere. We both had a good laugh on that, but we still call her by her name. The faucet and pop up drain were easy for him to install without any issues. Guinevere works flawlessly. I will show you how well in a video as soon as we do the reveal.

If you are looking for a new faucet check out TOTO USA. You can also follow them on Social media on Facebook, Twitter, Pinterest, Instagram and YouTube to see more of their products and here the latest news.

Stay tuned, and subscribe to our newsletter and social media channels so you don’t miss the reveals. Let me know what you think of our choice.


1 Comment

Filed under Curb Appeal, Home, Home Improvement, Review

Kitchen Update and Quartz Countertop Dilemma

I am back with an update on our new kitchen. I am happy to say, that 2 weeks ago we signed on the dotted line and our cabinets went into manufacturing. Since they are custom cabinets, they will be made to order and take at least 8 weeks.

We ended up going with a brand new Wood-Mode finish called Vintage Bright White. The Vintage finish is a distinctive glaze that is applied over the base color and adds a brushed appearance to the surface while highlighting the details of the door style and architectural elements. It also tones done the bright white and is just beautiful. The cabinets below are in Vintage Bright White. This is not the door I picked but I wanted to share the color with you.

We are also really excited about the integrated Häfele LED lighting matched to custom-fabricated Wood-Mode cabinetry. This lighting is brand new and we are the first kitchen that has it. I cannot wait because, I love light and I was forever saying I needed better lighting in the kitchen. This lighting will be in every cabinet and every drawer.

An industry-first, the Wood-Mode Integrated Lighting Program featuring Häfele LED solutions is a collaboration between two industry leaders to meet and drive the growing demand for integrated lighting design. The program utilizes the very best 12 volt, 3rd generation Loox LED options from Hafele. LED lighting is specified in 80% of kitchen projects overall (according to the NKBA) and offers energy-efficient, controllable, and discrete illumination with unlimited creative possibilities. You can read more about it HERE.

Beyond that, I have all the tile at the house and ready to be installed. I still need to pick the tile for the backsplash and that is where I am conflicted. The kitchen designer I am working with told me that it did not matter if I was having second thoughts on the color/pattern of the quartz now, because we have a lot of time. She said they will not  be coming to do the template until the cabinets are installed. That made me breathe a bit easier because I have been going back and forth with my choice. I selected Cambria Quartz in Nevern. I have a very large sample piece and I love it!

The problem is that Cambria Quartz does not photograph well. At least the Nevern does not. In almost every photo I see of it online, it looks like a dull, flat, ugly laminate countertop. The picture below is the one I hate the most, it does nothing to sell this countertop.

That frightens me beyond belief. I know, I like Cambria Quartz, because I had it in my kitchen for almost 10 years. It is just that they need to do a better job in showing the beauty I see in this sample. I have heard other people complain about the same thing. Most said that they had second thoughts based on photos, but were happy in the end when it was installed. They said that the photos did not do it justice at all.

So I was thinking, I should play it safe and go with something like Ella.

On my way to sign the contracts, I kept thinking about it, but my heart and my head were not sold on it at all. I was so glad that when I told my kitchen designer  I was thinking about Ella, she said, “Oh no, you do not want to go with Ella. You want something to make things pop!” I thanked her so much! It was the advice I needed! So Ella got kicked to the curb but I still am second guessing my choice.

I went on the Cambria Facebook page and asked them about my dilemma, but received as Verizon would say, a “half fast” answer. It was like they did not even read my question because they responded that I should look for a larger sample. I guess they missed what I wrote about having a large sample and the photos not looking at all like what I see in front of me.

I don’t know, I know I have time, but until I decide on the countertop, it halts the selection of the backsplash tile. Speaking of being halted, we have been halted for weeks with the demo crew. They should have completed everything by now. We have been held up for over 3 months, but let’s not even go there. Hopefully, work is going to begin next week. I feel like we are behind the 8-ball in getting everything done before the cabinets are ready.

Anyway, I guess this is not much of an update, but I wanted to let you know that things are still moving along slowly. The bathroom renovation has been halted a bit by this whole situation as well. I will have a post up about the faucet we chose for the bathroom in the next few days.

If you made it this far, thank you. If you would like to add any insight on the countertops, please do so in the comments. I would like to hear your thoughts. I will tell you one thing, if I do go for the Nevern and I love it, I will do everything in my power to get great photos of what it really looks like. I don’t want anyone else to have this uncertainty due to poor photos.


4 Comments

Filed under Curb Appeal, Home & Garden, Home Improvement

Find Out How a TOTO Washlet can Make You Feel Shiny and New Every Day of the New Year

Happy New Year everyone! I hope it is off to a great start for you. You have probably heard people use the adjectives shiny and new to describe the new year. Feeling shiny and new is exactly what I want to share with you today. I bet you don’t know where this is going. We are going to take this into the bathroom. I don’t want to talk about spring cleaning but do want to tell you about another kind of cleaning. Let’s call it personal cleaning.

I am not talking about a bidet. Quite frankly, I think bidets scare a lot of Americans who do not know what they are or how to use them. Not to mention, they take up a good footprint of space in your bathroom. So is there a better way to get that shiny and new feeling that is easier and faster than taking a shower every time you use the bathroom?

There is, it is called a Washlet. The Washlet was introduced in Japan by TOTO back in 1980 and has become one of their signature products. The first Washlet had 3 functions: rear cleansing, dryer and a heated seat. 10 years and numerous innovations later the Washlet came to America. In 2016 a milestone was reached when 40 million Washlets were sold worldwide.

So what is a Washlet and what’s in it for you? A Washlet is a bidet seat and you will be amazed at everything it can do for you. Do you get upset if the male members of your household do not close the lid after using the toilet? That is one of the first ways a Washlet will help you. The Washlet lid opens and closes automatically, so no more unpleasant surprises. If you worry about chilly seats, the Washlet has that covered too with a cozy, heated seat.

I love that it has an eWater+ system, that uses electrolyzed water, a proven, chemical free disinfectant to mist the bowl after every use. No need for harsh chemicals which are already banned in my home.

The wand of the Washlet is automatically cleaned before and after each use.
Eliminating waste effectively is easier when you are not starting with a dry bowl surface, the premist feature uses the incoming water supply to mist the surface which is 80% more efficient.


Next, let’s talk about rear cleansing, I know you are chuckling but also intrigued. The rear spray is designed to provide your derriere with a targeted, pleasant yet strong water stream to get you squeaky clean. The front wash feature provides cleaning in the way of large, soft drops for a comfortable wash that leaves you feeling clean as a daisy.

TOTO is not going to make you drip dry, they have thought of everything! The warm air dryer will make sure you are nice and dry before you go on your way.

Finally, there is an effective deodorizer that cleans the air around the toilet using powerful filters. Air is drawn in, passing through a catalytic deodorizer to eliminate unpleasant odors.

If you want a Washlet with all those features, the S350E is the way to go. It is available in round or elongated and comes in cotton white or Sedona beige. If you would like to see videos of all the features, visit TOTO on YouTube.

We are putting one of these awesome Washlets on our Guinevere Toilet. I will show you more on both as we are further along in the renovation of our bathroom. You have to love constructions delays. In the meantime, if you want to see more about the toilet we chose or some things to consider when choosing a toilet, you can check it out on our post HERE.

To learn more about Washlets and all their fabulous features click HERE. Do you have one of these in your home? Have you been thinking about getting one? Is this the first time you have heard of it? Let me know what you think or about your experience.

Special thanks to TOTO for all their help and for providing us with a Washlet S350e for our project. As always all my words and opinions are 100% my own.


11 Comments

Filed under Curb Appeal, DIY, Health, Home & Garden, Home Improvement

Do You Really Need a Pot Filler in Your Kitchen?

If you are designing a new kitchen, you probably know all about pot fillers. You might be wondering how we lived all these years filling our pots at the kitchen sink and carrying them over to the stove. Maybe you are thinking, it makes no sense because you still have to carry that pot of boiling hot water over to the sink to drain or empty at some point. There is also a point to be made that it is  another source of a potential leak, problem and of course expense in what already is a very expensive project. So, let’s take a look at the reasons why they are becoming so popular.

Less Strain on Your Body

Water has a weight of about 8 pounds per gallon. If you are filling up a large stock pot with water at the sink it can put a strain on your back as you carry it. However I don’t sit my pot in my sink and fill it, I usually set it up at counter height and fill it with my extended spray arm. If you are setting a large pot down in a deep sink and then hoisting it up and out, that could strain your back, especially if you have issues. However, most people have been doing this for years and are just fine.

Saves Time

The other point that is made to the advantage of a pot filler is that it saves time. I like to save time and work more efficiently but really, I doubt I am saving that much time to really make a difference. It is true you can turn it on and fill your pot on the stove and then go back to your sink to wash veggies or prep other foods. That could save you a few minutes, as long as you remember to keep watching the pot and run over and turn the water off before it overflows. I can see the advantage that you can easily be sauteing or cooking another part of the meal while you have a pot filling up on the stove. Not sure if this really is enough of a reason to convince people they need a pot filler.

Adds Style

I think this is the biggest reason you see them in more new kitchens today. It adds a touch of style and sophistication to your kitchen. I think many would say it adds a certain status to your project. I was speaking with a woman a couple of weeks ago and she was telling me about her son and how well he was doing. She went on to describe his house and said, “You know he even has one of those pot fillers in his kitchen.”


The facts remain that you need to carry that pot of water back to the stove which can strain your back as can hoisting it and pouring over a colander to drain pasta or other foods. That kind of negates the first reason. Sure, it may save a few seconds to minutes but does that truly justify the additional cost and of course potential source of a problem like a leak? I think the reason people put them in is based heavily on the third reason. Pot fillers look nice and they add a wow factor to your kitchen.

Some other cons are that they collect grease from cooking and it is another thing to clean. Cleaning the pot filler is something you would not have to do if you did not have one. Cleaning the pot filler will actually take longer than the time you saved in filling the pots on the stove. For those that like clean lines, having a pot filler extending from the backsplash may be an eyesore. There are deck mounted pot fillers as well but that is another permanent fixture protruding from your counter top.

I am still deciding if I am going to put one in my new kitchen. What do you think? I would love to hear your thoughts.


1 Comment

Filed under Curb Appeal, Decorating, Home & Garden, Home Improvement