Tag Archives: tutorial

Make A Carvel Style Ice Cream Cake at Home

When I was growing up, birthdays were always celebrated with ice cream cakes. Most of the time they came from Carvel but sometimes, my parents picked one up  at Dairy Queen. Our Dairy Queen used real cake in their ice cream cakes. I did not care for them as much as the Carvel cakes with the chocolate crunchy layer. I did like the fudge that was in the Dairy Queen cakes though.

With my own family, ice cream cakes are still highly requested for birthday cakes. I love to bake and make many different kinds of cakes, but had never attempted an ice cream cake. That changed a couple of weeks ago when I made my first ice cream cake. I choose to make one in the Carvel style, but enhanced the chocolate crunchy layer with a layer of fudge. 

I was surprised at how well the cake came out. I did have one issue, but it was easily solved.  I needed to stabilize my whipping cream, so that it could be piped onto the cake. It is very easy to do and I choose to do it by adding 2 teaspoons of Wilton Clear Piping Gel that I had on hand. It turned out fabulous. The next time I make it, I am going to use the stabilized whipped cream on the entire cake. There are also recipes for stabilized whipped cream using gelatin.

One of the reasons I like making my own ice cream cakes is because, I can customize them to our tastes using different flavors and non-GMO ice cream.  I am thinking a caramel layer may be a nice option as well. Even using a high quality ice cream, the cake we made cost much less than buying a  Carvel cake in the store. The prices of those cakes has increased dramatically over the years.

Making your own ice cream cake at home is not hard, but it does take time. You could make it in one day if you start early, but you are better off making it over 2 days. To start, freeze a 9″ springform pan.  There are some different ways you can use the pan. This first time, I used it with the bottom attached, but for my next cake I plan to use a 12″ lace doily cake circle. You can put the cake circle on a cookie sheet with the ring on top.

The trick is to not let your ice cream soften too much if you use this method. It works best if you keep the ice cream as firm as possible while still being spreadable. I have also seen people who make it directly on a silicone lined baking sheep with the ring.  I will update on how the cake circle method goes, and if I find it better than leaving the bottom attached.

I made a video tutorial of the process you can view below:

I picked up 2 containers of Breyer’s Non-GMO ice cream in chocolate and natural vanilla. I used chocolate on the bottom. After spreading it out in the pan, I let it freeze until firm.

Then I opened a package of regular OREO cookies and removed the cream from about 2 rows of cookies. I took the chocolate cookies and placed them in a zippered plastic bag and then crushed them coarsely with my rolling-pin.

I bought Hershey’s hot fudge topping and spread that on the frozen chocolate ice cream layer.

Then, I added the crumbled chocolate OREO cookies on top. I put the cake back in the freezer to freeze a bit while the vanilla ice cream was on the counter softening up. When the ice cream reached a spreadable consistency, I spread it out on the cake. It looked like there was not enough room to add all the vanilla ice cream.  I was surprised that I was able to add it all besides a tiny bit, I promised to save for my youngest son. With the vanilla ice cream spread evenly, I put the cake back in the freezer to set.

For the outer layer, I whipped up a quart of heavy whipping cream  with 2 teaspoons of pure vanilla extract and 1/2 cup of confectioner’s sugar. As I said above, I would use the stabilized whipping cream on the entire cake next time. To make that version, you whip the cream, vanilla and sugar until soft peaks form, and then add in 2 teaspoons of Wilton clear piping gel, and beat until stiff peaks form. Be careful not to overbeat your cream.

It was not difficult to remove the ring from the cake. I used a hot cloth, and loosened the cake with a butter knife and the ring popped off.

I added the cream to the cake and sprinkled the top with rainbow-colored sprinkles. Then, back in the freezer for the cream to harden.

The last step was applying the stabilized whipping cream to the top and bottom using a open star tip and a disposable piping bag

With the piping of the cream finished, I put the cake back in the freezer until we were ready to celebrate. Everyone loved the ice cream cake and raved about how good the fudge and chocolate crumbled cookie layer was. I will definitely be making our own ice cream cakes from now on.

Let me know what you think, and if you have made an ice cream cake in the comments. I would also like to know if you try this recipe, and how it turns out for you.


8 Comments

Filed under Baking, Cooking, Home & Garden

Italian Ricotta Cookies – Full Recipe and Video Tutorial

If you are looking for a tender, cake-like cookie that is not too sweet, but has a delightful lemon flavor that makes it perfect to pair with coffee or tea, this Italian Ricotta Cookie recipe will be one you want to try. These cookies are always a hit at our house. I even made 2 batches during Christmas in order to have some for my daughter to take back with her.

They are such a festive looking cookie to bake during Christmas and New Year’s, but you can make them any time of year. If you want, you can tint the icing with food coloring.  Some people like to tint it red or green for Christmas. You could tint it pink or blue for baby showers or gender reveal parties as well. I prefer white and just change the colors of the nonpareils or sugar sprinkles I use if I want to make them a bit different.


It is very important to use whole milk ricotta when baking these cookies, part skim does not taste the same. Also, be sure to cool the cookies on cooling racks before icing them. Never frost a hot or warm cookie. The recipe says to chill the dough, but if you are pressed for time, I have made them without chilling the dough and they came out fine.

Italian Ricotta Cookies

Ingredients

  • Ingredients For Dough
  • I cup of softened butter
  • 2 cups of sugar
  • 1 ¾ cups (15 oz) of whole milk ricotta cheese
  • Finely grated zest of 1 lemon
  • 2-1/2 tsp of pure vanilla extract
  • 2 large eggs
  • 4 cups of flour
  • 2 tsp of baking soda
  • 3/4 tsp of sea salt
  • Ingredients For Icing
  • 1 tbs of melted butter
  • 1-1/2 tsp of pure vanilla extract
  • 4 cups of confectioners’ sugar
  • Juice of one lemon
  • 1/4 to 1/2 cup of milk (use as needed to think icing to correct consistency)

Instructions

  1. Cream the 2 sticks of butter with sugar until fluffy with electric mixer. Add ricotta, lemon zest, vanilla extract and mix well. Add in eggs, one at a time. Scrape sides of bowl and then begin to slowly mix in flour, one cup at a time. Add baking soda and salt and mix until blended. If you want you can chill dough for several hours or overnight. You can also bake immediately.
  2. Scoop with a cookie scoop and place about 2" apart onto a non-stick baking sheet liner or parchment paper. Bake cookies at 350 degrees F. for 15 minutes or until golden brown on the bottom. Remove cookies and let cool on wire rack.
  3. To make icing, melt 1 tablespoon of butter and whisk into the confectioners sugar with lemon juice, add enough milk to make a spreadable icing. Using an offset spatula or butter knife, spread icing onto top of cookies and sprinkle with sprinkles, nonpareils, decorative sugar or other decors. Let cookies set until icing is hard.
https://www.mommyramblings.org/2017/12/29/italian-ricotta-cookies-full-recipe-and-video-tutorial/

Watch my complete baking tutorial video for these cookies below.


Please let me know if you try them and what you think.

112 Comments

Filed under Baking, Cooking

Easy and Delicious Mini Cheesecake Recipe

I have been making these mini cheesecakes for my family for over 20 years. If I didn’t make them, my kids would be crushed, because it is one of my traditional dessert recipes that I bake for Thanksgiving, Christmas Eve, Christmas Day, New Years Eve, New Years Day, Easter and other special occasions.

They are very easy to make, and they are such a hit because you can top them several different ways which makes them even more appealing. If you are looking for a mini cheesecake recipe that is easy and delicious, you found it! This tried and true recipe is posted for you below.


This recipe is supposed to make 18 mini cheesecakes, but there is always enough filling for a few more, so I add the crumb mixture to 3 or 4 additional, lined muffin cups. I hope you give this recipe a try,  I think you will really like them.

Mini Cheesecakes

Mini Cheesecakes

Mini Cheesecakes

Ingredients

  • • 1-1/2 Cups of Graham Cracker Crumbs
  • • 5 Tbsp. Melted Butter
  • • 3 Softened 8 Ounce Packages of Softened PHILADELPHIA Cream Cheese
  • • 3/4 Cup of Sugar
  • • 2 Tsp. of Pure Vanilla Extract
  • • Zest of 1 Fresh Lemon
  • • Fresh Lemon Juice (I use the juice from ½ of the lemon)
  • • 3 Large Eggs

Instructions

  1. Preheat oven to 325°F.
  2. Mix graham cracker crumbs and butter; press evenly onto bottoms of 18 lined muffin cups. I always have enough mixture for more than 18 cheesecakes so I put the mixture into at least 21 lined muffin cups. Put these into the oven for 5 minutes or until lightly golden brown.
  3. Raise oven temperature to 350°F.
  4. Beat cream cheese, sugar, vanilla, lemon zest and lemon juice in large bowl with mixer until well blended. Add eggs, 1 at a time, mixing on low speed after each just until blended. Fill your muffin cups about 3/4 of the way with this mixture.
  5. Bake 20 min. or until center is almost set. Cool completely. Refrigerate 3 hours.
  6. Before Serving top each cheesecake with about a tablespoon of the pie topping. You could also top with whipped cream and fresh berries, fruit preserves or jam.
https://www.mommyramblings.org/2017/12/27/mini-cheesecake-recipe/


Let me know what you think if you try this recipe.


12 Comments

Filed under Baking, Cooking, Home & Garden, Recipes

How To Start a Facebook Page for Your Blog or Business-Step-By-Step Guide

If you have a blog or business and you want to create a Facebook Fan Page but don’t know where to start, we can help. If you still have not started a blog and need help, go to our, How To Start A Blog Tutorial first.

You might wonder if you really need a Facebook Page for your blog or business. Social media is one of the easiest ways to connect with your target market or audience. A Facebook Page allows you to bring targeted content, promotions, sales and giveaways in front of hundreds of thousands of potential customers, clients or readers who are looking for what you have. It also gives you a platform to showcase photos of your work. We know a picture is worth 1,000 words. If you are an artist, photographer, restaurant owner, contractor, decorator, DIY blogger, crafter and more, post fabulous photos of your best work to attract your audience.

Bloggers should use a Facebook Fan Page to interact daily with their audience. They can do this by posting call to action posts that ask a simple question like, what is the last book they read or what is their favorite classic movie. Beyond that, all blog posts should be promoted on your Facebook Page. There are many plugins or widgets that will automatically post to your page as soon as new posts are published.

Businesses can use their Facebook Page to connect with clients and customers and improve customer service by engaging and answering any questions or concerns they may have. 

So, now that you understand the importance, let’s get your Facebook Fan Page up and running. I promise, it will take only a few minutes. 

The first thing you need is the name of your page.  If you already have your business or blog, it is easy, just use that name. If you do not have anything and are just starting, think of a name.

Once you have your name, you might want to check on domains for that name if you don’t already have one. The reason I am saying this, is because you may be thinking small now and just want the Facebook page. However, if you decide to start a website for your business or blog later, and want a domain with that name, you might be very disappointed to find it is not available.

You can research domain names on  BlueHost , if you sign up for their low-cost hosting for your website, it includes a free domain! If you do find an available domain for your business or blog, it is a good idea to purchase it while it is available.

Step one,  go to Facebook. Click “HOME” on the top of your page. On the side You will see pages and then on the bottom something that says “create a page” and you click that.


After that, you will be directed to a page where you pick a category for your blog. For bloggers, photographers, musicians etc. you should choose the Artist, Band or Public Figure. If you have a cause, choose Cause or Community and so on. Just pick the best category for your page. Then, you can choose a sub-category and add your page name.


Next, it will take you to where you can enter your “About” information. Let everyone know what your page is about. You can also skip this, but the more details you have, the more people will find your page.

Now, you need to add a profile photo. I am also going to cover the cover photo here too. To add photos, you can use your own photos.

If you don’t have any that will work, you can try free photo sites like Pixabay.com. These are royalty free and can be used without any attribution. Type a word or two into the search bar and search for images. When you find one you like click on it and then save in your files.

You can then upload the images to Facebook to customize your page. If you want to add elements to your cover photo you can use FotoJet.  Just upload your image and customize.

To add a title you can choose an overlay or just add text directly. Many of the features are available for free. Anything with a special icon is only available if you have a subscription. This screenshot is from PicMonkey which has a free trial or you could use FotoJet or any other photo editing software you like.


You can change colors, sizes and more to really make it your own.


When you are happy, save it to your computer and then upload to your page.

Add your page to your favorites so you can find it easily.


You can customize who the ideal audience for your page is. Do not limit your audience too much.

Audience


At this point you are ready to go, you can learn more about promotion and adding buttons etc. but the basic page is done.

So what are you waiting for? Write your first post. Good luck guys, any questions you can ask them in the comments. 


Some of the links in the post above are affiliate links, if you purchase through these links, I may earn a commission. All of the links in this post are products or services that I recommend because I truly believe they are the best and would recommend them whether or not I earn a small commission from them. 


5 Comments

Filed under Blogging, Tech, Tutorial

Candy Corn Painted Rocks-DIY Craft Tutorial

It seems that rock painting is all the rage now. I certainly was ahead of my time and ahead of this craze. I love painting rocks, river rocks are my favorite. Gathering them is a fun family adventure we all look forward to.

Sometimes I know exactly what size and shape rocks I want. This is due to the fact, that I have a specific project in mind. Other times, I try to find rocks that inspire me.  You might not think rocks can inspire people, but they can!  I see them as a blank canvas and they speak to me…well, some of them do.

A few rocks I made for my daughter.

I can  clearly visualize the masterpiece they can become. Sometimes it is a fish, ladybug or owl, and other times it is a heart. One of my favorite projects was making rock candy corn.

The one that started it.

It was so much fun to find the shapes I needed. Since I wanted to make a candy corn family that represented ours, when I found the especially tall and thin triangular river rock, I literally squealed with delight. That rock clearly represented my son Michael, it was so easy to see. I asked my youngest sons, who were gathering rocks with me, and they wholeheartedly agreed. It was definitely Michael, no doubt about it.

A Trip to find triangular rocks.

All you need is some acrylic craft paint, paint brushes, paint markers for detail painting and ModPodge sealer. If you want you can paint your rocks white on both sides first. It will take at least 2 coats of paint to get nice coverage.

When the tri color rocks are dry, you can then add personality with the paint markers.

He reminds me of Bozo!

Use ModPodge to seal and protect your creations.

This guy makes me laugh!

Please let me know if you try this project, I would love to hear about your results.

 They needed personality, so I gave them some!!!


3 Comments

Filed under Crafts, DIY, Halloween, Tutorial

Caregiver Basket Tutorial

This shop has been compensated by Collective Bias, Inc. and its advertiser. All opinions are mine alone. #ConquerInco #CollectiveBias

Being a caregiver for a loved one is not easy, especially when it is a family member we are close to. After my mother passed away suddenly, I became a caregiver for my father. My father passed away 364 days after my mother. In those days there were many emotions that surrounded me, my own grief, my father’s grief and my children’s grief. Even though, it was a sad time, we still were able to do things together like go out to dinner, visit with friends and family, travel during the holidays and more. Those special times created many precious memories we treasure today.

My father never lost his love of cooking for his family, and he liked to get out and shop for the things he needed with me. One of his favorite stores was Sam’s Club. Sam’s Club made it easy for us to get everything we needed including all the caregiving needs for my dad.

Today, I have several close friends and relatives who are acting as caregivers for aging or sick parents.  I know they too, appreciate being able to have a one stop store like Sam’s Club where they can get all their essentials along with the caregiving supplies they need. Sam’s Club Members Mark Total Protection products like their adjustable briefs for men and women are the perfect choice to help your loved ones carry on doing the things they love, without losing their self-confidence. Total Protection briefs help them #conquerinco with quality and performance that is just as good if not better than the more expensive brands.

Loaded with features like adjustable side panels for a secure fit, these briefs quickly wick moisture into a super absorbent core for superior dryness. The odor guard technology gives wearers confidence to get out and do the things they want without fear. This is a great thing, because everyone should enjoy, every moment, doing the things they love for as long as possible. This means more fun times making cherished memories together.

Members Mark Total Protection products are located near the pharmacy department of  your local Sam’s Club. The large packs are affordably priced, giving you the great value and superior quality that Sam’s Club members like myself depend on.

Thinking about my friend, I decided that making a caregiver basket would be a really good thing. Many times as caregivers, we focus so much on the needs of others, we can forget to take care of ourselves. I wanted to make sure my basket would include things to help caregivers replenish their energy and hydrate their bodies so they can be the best they can be for their loved ones.


Below you can see a video tutorial for creating a caregiver basket. If you know someone who is caring for a loved one, why not make them up a similar basket to let them know you care about them.


I packed everything in a medium size plastic bin but you can use any kind of container that will fit the contents. Don’t stress too much over making it perfect, because the thought will mean the most to them.

What do you think about this basket? Do you think it is something a caregiver would appreciate?  Have you ever been a caregiver to someone. Let me know in the comments.


Leave a Comment

Filed under Family, Health, Life Stages, Shoppertunity

Make Our Get “YOU” Back To “YOU” Treat Bags -#EatASNICKERS

This shop has been compensated by Collective Bias, Inc. and its advertiser. All opinions are mine alone. #EatASNICKERS #CollectiveBias

#EatASnickers Collage

Have you ever been so hungry you turn into a different person? Do you find it hard to even think straight at that point? If so, you need something to take the edge off that hunger. You need something fast that’s going to satisfy that extreme hunger that’s transforming you.

Many people including myself seem to turn into someone else when that hunger strikes. I have found it is better to be prepared for these hunger attacks. For me, SNICKERS® bars are an extremely satisfying and delicious way to curb my hunger. Mine usually strikes mid day for me.  SNICKERS® has been one of my favorites as far back as I can remember. I love the caramel, milk chocolate, nougat, and roasted peanuts that are packed into each bar.

SNICKERS® Get “YOU” Back To “YOU” Treat Bag Tutorial:

I want to share a fun and easy gift bag tutorial with you.  These SNICKERS® Get “You” Back To “You” Treat Bags are funny and serve a purpose. Keep some in a basket on your counter, on your desk at work or in your purse. You can hand one to that mom in the school pick up line that is clearly not herself. Give one to your coworker who is coming unhinged or your best friend, who is turning into someone you don’t know. Whoever you share them with, they are sure to appreciate you helping them get back to themselves. Don’t forget about yourself, you want to be able to get back to you fast too!

snickers gift basket

I was in Walmart recently and picked up some multi packs of SNICKERS® full size bars in the candy aisle. SNICKERS® individual full size bars can be found on store displays and in/near the checkout aisles. While I was there I picked up some craft ribbon, treat bags in clear, red and yellow and some colorful paper napkins.

Snickers in store collage

I made three different bag labels with PicMonkey and Microsoft Word and printed them. You can add your own touch in saying what you want. Next, I glued them  to some heavy construction paper using a glue stick. You could also use card stock.

Snickers printable tutorial

Snickers printable 3

After that, I cut them out and punched a hole in the tag for the ribbon.

Snickers printable 4

Snickers printable 6

Snickers Printable 7

I took a treat bag and put one full size SNICKERS® bar and a colorful paper chevron stripe napkin. You need the napkin because as you or someone else turns back into themselves they will remember their manners.

Snickers Gift bag

Then use the little twist ties that come with the treat bags to close the bag. Use any kind of ribbon your like to attach the tag. That’s it! Wasnt’ that easy. You can do all kinds of variations of this idea. All kinds of treat bags can be used, you could add a mini bottled water if you like. You really can make it as simple or elaborate as you want. Customize them for your child’s teachers, bus driver or babysitter.

Snickers gift bags 3

Snickers Gift Basket 1

snickers gift basket 3

Now I have something really fun to share with you. Find out who you are when you’re hungry by taking the quiz below. Let me know your results in the comments. I also love to hear what you think of the treat bags and if you are going to give them a try.


1 Comment

Filed under Humor, Shoppertunity, Tutorial

How To Make An Adorable Applique Birthday Shirt!!! Easy and Quick Project!

I like to have birthday shirts for my kids and take a picture of them in it on their actual birthday.  A few years ago I made one but most of the time I buy them. However, after the success I had with the Christmas shirts, I decided to try and make an applique birthday shirt for my son.  It was so easy and looked great!  If you would like to try, you can follow the easy tutorial here.

DIY Birthday Shirt Collage

Supplies:

  • Plain Shirt- short or long sleeve
  • Material- small amount for number
  • Number Template- easy to find online
  • Scissors-Craft and Fabric
  • Thread to coordinate with number fabric and shirt
  • Sewable Heat Bond
  • Iron
  • Straight Pins
  • Sewing Machine with Applique Stitch or you can Zig Zag.

Prep:

Make sure to wash your fabric and shirt before starting and then iron.


1. Cut some fabric for your number

bday shirt 1

2. Cut a piece of sewable heat bond and iron it on the back side of the fabric.  **Remember when cutting the sewable heat bond or the fabric that has it ironed on, never use your fabric scissors!  You will ruin them.  Always use your craft scissors when cutting anything with heat bond.

bday shirt 2


bday shirt 3


3. Place the number template on the front side of the fabric, pin and cut.

bday shirt 4

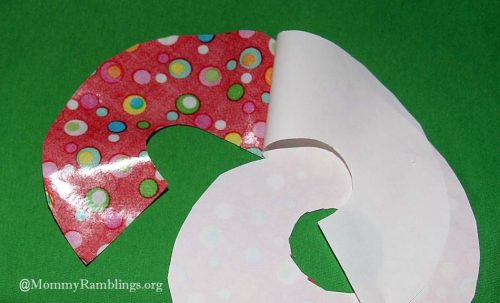
4. Remove the heat bond paper backing from the number,  the nice shiny texture will allow you to iron the number on and hold it securely to sew.

bday shirt 6

bday shirt 7


bday shirt 5

5. Iron the number on the shirt.

bday shirt 8


6.Take the shirt over to your machine and use an applique stitch around the edges

bday shirt 10


7.Trim the loose threads and iron the shirt and you are finished.

bday shirt 11

Please share with me if you try this.  I would love to see and hear about your creations.


9 Comments

Filed under DIY, Giveaway