Category Archives: Home

The Quick and Easy Way To Securely Hang Almost Anything

If you love to decorate with artwork, prints, shelves, box signs and more, you are not alone. I think decorating our walls really helps to personalize our homes and lets us show our style.

However, every time I go to hang something, I want to be sure it is secure. I don’t want something falling off the wall and breaking, or worse, hurting someone. If you are lucky and have a stud where you want to put something up, you are set. If you don’t find a stud, you have to go a different route.

That is why I like GripIt Drywall Anchors, they can hold up to 250 lbs of weight letting me hang even heavy items right on my sheet rock walls. I find the 8 pack with reuseable screws perfect, it is nice to have several on hand for when I want to hang a few things or create a gallery wall.


Another great tool is the Marxman marking pen, which is a deep hole marker that lets me easily mark even hard to reach places and perfect to use on any surface. It is great for so many of my DIY projects.

My husband loves the Marxman too! He finds it so much more effective than pencils or traditional markers. You can send a burst right through a small hole to the surface beneath and you are left with a flourescent green spot that shows you exactly where to drill.

With these two tools in our tool box, we are ready to put up anything we need to, even very heavy items are no problem. You can learn more about GripIt on Facebook, Twitter and Instagram.

GripIt and Marxman are available on Amazon. Let me know what you think of them in the comments. What kind of projects would they help you out with?


Leave a Comment

Filed under DIY, Home, Home & Garden

Grip-It Is The Ultra-Strong Way To Hang Your TV #Giveaway

Do you want to hang your flat screen TV on the wall? If so, you are in good company, because it is a very popular way to showcase your TV and enhance your viewing options.

When you are looking fo the best way to secure your TV, check out Grip-It ultra strong plasterboard fasteners. Grip-It is designed to securely  hang anything that weighs up to 400lbs. This innovative product took the UK by storm , has been seen on TV, and is the winner of the BBC show, Dragon’s den.

Grip-It’s  patented design is masterfully engineered to provide a safe and secure wall fastener that works 100% of the time, so that you can confidently hang your flat screen TVs without the fear of it falling down and breaking.

Grip-It has 3 unique gripping system that creates a vice like hold in plasterboard walls. All you need is just a simple DRILL, TAP and TURN for quick installation. Once drilled, the unique backing wings expand inside the wall to provide a secure anchor, creating a strong tight grip.


Giveaway:

Would you like a chance to win your own Grip-It TV Kit? If so, enter our giveaway below.

Win the Gripit TV Kit #10


Leave a Comment

Filed under Giveaway, Home, Home & Garden, Review

Cluttered Concerns – How A Messy Home Negatively Influences Your Life

A messy home can have a surprisingly negative affect on our mental health and wellbeing. From clutter and filth, to dust and decay, the consequences of mess go beyond aesthetics and can cause debilitating emotional, social and physical distress.

Nasty Surprises

One the the most obvious and disgusting outcomes of a messy home is that it is prone to attracting unwanted, pesky visitors, such as rodents, cockroaches, spiders and ants. These creatures are attracted to leftover food scraps, accumulated waste and other debris.

Piles of clothing and clutter also make excellent hiding spots for spiders. Species such as the much maligned white-tail spider are known to frequent clothing piles, and enjoy making their homes in your piled laundry.

For infestations of these pests, as well as mice, rats and roaches, it’s best to call in a pest control professional to locate the source of any nests and block any existing entry points. If you’re wanting to decrease the frequency of these infestations, it’s a good idea to practice better home hygiene, beginning with the kitchen.

Make sure to wash all soiled items after use, and wipe surfaces clean of crumbs and debris. Reseal used products and place them in the fridge or in a sealed cupboard. For bedrooms and bathrooms, store fabric items and clothing on hooks and hangers.

Metaphorical Mountains

Symbolism can be important when it comes to our emotional wellbeing, and you don’t have to look far in a messy home to find your first metaphor. If you’re the type of person who likes to collect mountains of stuff, or considers the floor an appropriate place to store clothing (ie; a floordrobe) it can be an indication of other emotional or physical issues which might be affecting you.

Cleaning and organising can seem both needlessly tiring and unnecessary at times, especially if you’re already stressed or tired. Unfortunately, the benefits of a clean house will be most obvious to you in those times of emotional distress, and can further impact your ability to pull yourself out of it.

To combat mess or clutter building up over time, set yourself small and completable tasks to complete every day which are non negotiable. For example, wiping down the bath or shower after using it, or cleaning the toilet every third day. By putting small and manageable routines into place, you can stop insurmountable or stress-creating mess from ever building up, and in turn give yourself a cleaner, healthier space to live in for those moments when you’re truly craving peace and clarity.

Visitors? No Thanks!

Another not-so-nice consequence of a messy home is its potential impact upon your social life. A messy home can create the inability to host guests in your home, resulting in a lack of social connection. For many people this can be isolating and lead to further stress and discomfort.

If you’re trying to create a neater, more easy to manage space in order to improve your social life, start gradually. A good place to begin is in the kitchen. A clean kitchen is a more inviting space to cook in, and it’s often a hub of activity and social happenings within a house. Regularly clean your stove, cooking utensils and dishware. By doing so you’ll always have clean dinner dishes and cups for tea and coffee in the event of guests.

Once you’ve made an effort to clean your kitchen, try to organize your living and dining space into a more social-friendly space. Create an area with clustered chairs so that it’s inviting for guests to sit at. From there, move gradually to cleaning the bathroom, any outdoor areas, and then bedrooms.

Reforming a messy house into a more manageable and liveable environment will have positive emotional and social outcomes for you and your family. By starting slow and engaging professionals where necessary, you can regain control over your house and your clutter – one small step at a time.

This is a sponsored guest post that does not necessarily reflect the views or ideals of Mommy Ramblings.


2 Comments

Filed under Home, Home & Garden, Life, sponsored guest post

Shop Personalized Cart For Special & Unique Gifts

Have you ever wracked your brain trying to think of the perfect gift for someone special? If you are like me, you probably have. When I am really stuck, I try to think of something unique. Personalized gifts are a great choice for one-of-a-kind presents.

Recently, I was looking for something special for my husband on Personalized Cart. I found a large watch case that was just perfect. My husband loves cases like this, and I appreciated how large it was with 12 compartments on top, and a drawer on the bottom. The top has a clear glass pane that allows you to see inside, but I thought you could add a special photo or other artwork to change the look.

Each of the compartments has a soft pillow that you can fasten your watch around. You could also remove the pillows to store other items. It is a very versatile box that can be used to store many kinds of items. The drawer on the bottom is perfect for holding my husband’s wallet, pens, passport and more. Best of all, I was able to have it customized with his initials.


The workmanship of the box was very nice with dovetail detail on the drawer and a sort of weathered finish that makes it look like an heirloom. This box would make a great birthday, Father’s Day or Christmas gift for anyone.

Check out the Personalized Cart site for many other items for women, men, babies, weddings and other occasions. Don’t miss the giveaway below for a monogram necklace. For other unique gifts, hover here for more info.

Giveaway:

Personalized Cart is sponsoring a giveaway on Mommy Ramblings! One lucky blog reader will win a monogram necklace in the style of their choice. Thank you to Personalized Cart for the review watch case and for sponsoring this great giveaway on Mommy Ramblings! Open to US residents.

Monogram Necklace from Personalized Cart Giveaway on Mommy Ramblings Rules:

Enter for your chance to win using the Rafflecopter widget below. Good Luck!!!


Continue reading


58 Comments

Filed under Father's Day, Gifts, Giveaway, Home

5 Helpful Painting Tips To Paint Like A Pro

Winter is a good time to tackle some indoor home improvement projects. You would be surprised at what a fresh coat of paint can do to chase the doldrums of winter away. So, if you are ready to freshen up your walls, check out these 5 helpful painting tips to help you paint like a pro. 

Safety First:

Protect your eyes from paint drips or flying debris with a pair of plastic safety glasses or goggles. Make sure your room is adequately ventilated and if you are using any product with strong fumes, wear a respirator.

Prep First:

No matter how excited you are to get that color on the walls, you cannot skip the prep. Check your walls for cracks, holes, dents, stains or other imperfections.  For most issues, a lightweight spackling compound and putty knife will be all you need. Just apply the compound and remove the excess. Allow the area to fully dry then sand lightly until the area is smooth and uniform with the rest of the wall.

Remove dirt and debris by washing down the walls. Remove all outlet covers, pictures, hooks, nails etc. Remove as much furniture and belongings as possible. Having a clear space will make painting much easier. Using a painter’s masking tape, tape the room to prevent paint getting on the molding. Cover the floors with drop cloths.

Use Primer:

Primers are developed to help seal your walls, prevent mold and stains and can even be tinted to the color of the paint you are using. Since primer is less expensive than paint, using a tinted primer means you won’t need as many coats of paint  and that will save you money. You can buy a paint and primer in one too, but when you are painting on new drywall, you will want to use a primer first no matter what type of paint you are using.

Cut In:

Start by cutting in with the primer or paint/primer. You want to cut in where the ceiling meets the wall, around windows and doors and where the walls meet the baseboard. It is best to do this one wall at a time. You should cut in and paint the wall and then move on to the next for the best looking results.

Load your roller and start at the top, roll a W or a V shape over a section of the wall and continue until the sections is covered. Then move on to the next, reloading your roller as needed. Allow ample time for the first coat to dry before accessing if you need a second coat.

Clean Up:

Remove the painter’s tape, if left on too long it can become difficult to remove. Clean paint brushes, rollers and roller trays per manufacturer’s instructions. Tightly seal paint cans. Before putting outlet covers back on you can put a piece of masking tape to the back and write what paint color you used on it.

I hope this post inspired you to take on those dingy walls in your home. There are so many color options out there and even if you are not ready for a big color change, you could do one accent wall to make the room pop. Let me know if these tips helped you and tell me all about your project in the comments. Happy painting!


1 Comment

Filed under Home, Home & Garden, Home Improvement

10 Simple Ways to Organize Your Kitchen

If your kitchen is like mine, it is Grand Central Station for your home. I know when my kitchen is organized, it is easier to find what I need, and to work more efficiently. Here are 10 simple ways to organize your kitchen.

Purge Your Cabinets

Take everything out of your cabinets and drawer. Think carefully, do you really need it all?  I am almost sure you will find, there are many things you need to get rid of or donate. Put back only what you need. Place the items that you want to donate in a box and put the box by your door. On your next trip out to your vehicle,  carry the box to your car, so it is ready to be dropped off.

Group Similar Items

With your cabinets empty, start to really think about the best way to group items in them. Look at the things you are keeping and arrange baking things together, serving pieces together and so on.

Think About Your Space

Next, think about the best cabinet or drawers to put those things. Drinking glasses are probably best by the sink and dishwasher. Remember, you want things to run as smooth as possible, so have your coffee maker near your mugs and your pot holders near your oven. Be mindful of this as you decide where everything you are keeping goes.

Use Clear Plastic Bins

Use clear bins and containers to organize things inside your cabinets. Small bins are perfect for containing hot cocoa packets, oatmeal packets and more. Food in tiny boxes like pudding, can be stored in clear containers, so  it does not get lost among larger items.

Another food or pantry storage idea, is to use clear mason jars. You can even vacuum seal them if you have a Food Saver with a jar device.


Go Through Your Food Storage Containers

Go through your food storage containers and get rid of anything you don’t have a lid for. Organize what you have left by placing the lids in a clear plastic bin, so they can be stored  vertically. If all you have is just a bunch of tired Chinese food containers with no lids, think about throwing it all out and starting with a set of quality food storage containers.

Utilize Space Effectively,

That cabinet above your refrigerator, microwave or oven can be fitted with vertical rack dividers that allow you to store cookie sheets, trays, platters and more. In my new kitchen, I chose to have these dividers built in. I can tell you, it is much easier to store cutting boards, baking pans, large platters, trays etc. I did this to the cabinet above my oven and the one over my refrigerator.

Organize Your Drawers

Pick up some bamboo drawer dividers to organize your utensils and cutlery. You can find ones that expand to fit a variety of drawer sizes.  Smaller plastic bins can help you contain pens, pencils, tape scissors etc. Allow yourself only one junk drawer if possible.

Tackle Your Refrigerator

Clean out your refrigerator. Wipe down all the surfaces inside and out. Go through all your food and condiments, and get rid of anything that is old, expired, or you don’t use. Grab some plastic bins and use them to organize your food especially smaller items like juice boxes, food pouches and smaller condiments.

Another idea that can save you time is to organize items that you use to pack lunches for yourself or your kids. That way you can quickly grab things like yogurt, cheese sticks, juice boxes, fruit etc.

Finally, if you like to keep a lot of cold drinks on hand for yourself or the kids, you may want to consider getting a dedicated refrigerator for these items. The best beverage refrigerator by Danby can hold up to 120 cans and is quite compact so it won’t take up much space in your kitchen.

Get Under the Sink

Maximize your space under the sink with a 2 Tier Expandable Adjustable Under Sink Storage Shelves. This will maximize your space to store your cleaning products, soaps, sponges and more.


Hang It Up

Organize your mop, broom, dustpan and more with a hanging storage rack that you can mount to the inside of a closet or pantry door.

It is easy to organize your kitchen when you have the right tools. Weeding out the excess and organizing what you have will maximum your kitchen’s efficiency. With a streamlined and more organized kitchen you might find you like cooking and entertaining even more.


9 Comments

Filed under Home, Home & Garden

How to Display Colored Artwork Around Your Home

Do you ever find yourself just going on a coloring spree? I know I do. After a long day, there is nothing quite like taking a hot bath, grabbing a glass of wine and my favorite coloring book and just forgetting about the world for a few hours.

I’ll even let you in on a little secret… If the week hasn’t gone so well, or I just can’t seem to get my fix of colored artwork, I can finish an entire coloring book in a matter of days. Sometimes, I feel guilty because I feel as though I might have wasted the book by speeding through it.

However, when I look back on the beauty I have created, I think: “This ought to be displayed and appreciated, not closed up in some book on a shelf.” So, if you find yourself looking for ways to show off your colored artwork, consider displaying it around your home.

Avoiding Common Mistakes When Displaying Artwork 

Displaying colored artwork is an art within itself. What can you do other than just tape the page on the wall Let’s start with what you shouldn’t do. Here are a few things people commonly do wrong when displaying their colored artwork:

Tear the pages out of the book.

Rather than going all in and ripping the finished colored artwork right out of the book, take a calmer approach.
Use scissors to gently and precisely cut the page out or remove the cover and binding of the book so that the pages naturally come out.

Overusing the same sized pages.

You’ve heard the saying – too much of a good thing is bad.  Well, too many of the same sized colored artwork pages are not the most appealing. Instead, use pages from a few different books that still have a compatible color schemes, but vary in size. This will add some dimension and character to your display.

Lacking regard for a color palette.

While a variety of colors is beautiful, a finished piece of colored artwork with clearly no color palette in mind can be a bit mind boggling, and leave the viewer confused and overwhelmed. Beyond that, it can be incredibly hard to find a place where such a display will fits well.  Instead, pick a color palette that compliments the area you plan to display your colored artwork so that it flows well and accents the space, rather than standing out like a sore thumb.

Over cluttering the wall.

A picture is worth a thousand words, right? So, if you add 10 pictures to one small space, you have essentially placed 10,000 words on one small wall. Instead, leave some white space. Allow each picture to speak for itself and give it room to breathe rather than cluttering one entry wall with every picture you have ever colored.

Incorrectly hanging the art.

Once you have chosen which colored artwork pieces are worthy of display, the last thing you want is to wake up the morning after hanging them to find them on the floor. Instead, invest in quality hanging materials to ensure your artwork stays safely in its place. So, now that you are well versed in the things you shouldn’t be doing, let’s go over the things you should be doing:

Creative Ways to Display Colored Artwork Around Your Home

If you just can’t get enough of your favorite, completed page from your coloring book or your home could just use a little sprucing up in the artwork department, try displaying your artwork around your home like this:

Design your first animal clothing line.

If you are like me and are one of those fur parents who love to dress your animals up just about all year round, this display is for you. When you print your artwork out onto some fabric for your pillows, go ahead and grab a little extra to create the perfect t-shirt for your favorite furry friend. Who knows? Maybe they will even convince their pal at the vet to get one, too. Add some personalized tags and washing instructions to really make it your own!
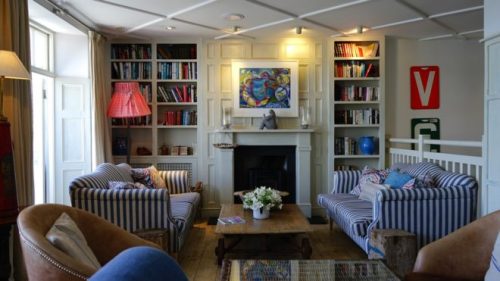
Create a view.

Typically, a window creates a view – it gives the wall a definite shape by adding a square or rectangle to it, giving the room a focal point that lets you appreciate the beauty outside.

But, what if there is no window?  No worries, just add some of your favorite colored artwork! Use pattern scissors to give the artwork a decorative edge and then place it in an oval, square or rectangle frame and hang it  above your couch or in front of your kitchen sink to define the space.

Bonus: If behind the kitchen sink is your location of choice, it will give you something beautiful to look at while you do the dishes!

Make magnets…to hang more artwork.

Display your artwork with some artwork – sounds a bit like overkill, right?  This is a great way to switch up the normal look of a standard coloring page and also a great way to use your colored artwork for practical purposes.
Use round button magnets and clear glass marbles to create colorful magnets, then use those to display your other colored artwork on your fridge, dishwasher, or even your chalkboard or whiteboard.

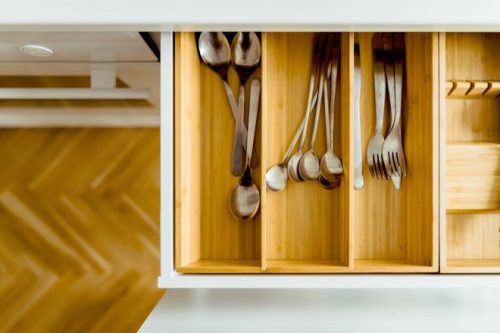
Use it as placemats.

I know what you’re thinking: You would never use your artwork as something to eat off of, right?
Good, because neither would I! However, with a little lamination, you can use your artwork as a placemat without damaging it, and it is quick and easy to clean. Plus, most placemats will be the size of at least two pieces of artwork, so you can display more than one at each place setting.

Cover your pillows with it.

One of the easiest ways to decorate your couch is to add an accent pillow. What about showcasing your artwork? Talk about the perfect way to spruce things up and make it your own!  Print your colored artwork onto some fabric then wrap your couch pillows you already have and transform them in a matter of minutes. Your kids will love to nap on them.

Displaying your artwork does not have to be as simple as ripping out the page and hanging it on the wall. You have already worked so hard on it, why not take it to the next level and get creative?

Happy decorating, friends!

This is a sponsored guest post and does not necessarily reflect the views or ideals of Mommy Ramblings.


Leave a Comment

Filed under Decorating, Home, Home & Garden, sponsored guest post

Helpful Tips for Winterizing Your Home

The summer has folded its wings and you’ve got to buckle down and prepare for the coming winter. This isn’t much of an issue if you live on the West Coast; but even in that region, gray days are ahead, and you want to make sure your plumbing, heating system and any other necessary repairs are taken care off.

The first thing you want to do is make sure that your heating system has undergone regular maintenance. If it hasn’t, now is the time to start looking for reputable HVAC Contractors in your area; they can take a look at your air conditioning unit, furnace and more. Keep their number handy for emergency services, too, when they’re available 24 hours a day, 7 days a week – even on holidays.

Check The Status Of Your Roof

Whether the rain or the snow hits (or both, for that matter), you’ll want your roof to be in tip-top shape this season. Hire a handyman if there’s no one in the house who can safely climb a ladder to inspect the shingles. This past summer has been a hectic one with hurricanes and strong winds in some parts of the country, so you want to make sure damaged or broken sections of the roof are fixed just in case inclement weather hits your region.


For flat roofs, all it might take is a rake to get rid of pine needles and fallen leaves, so the water they retain doesn’t cause mold to build up. In fact; mold can be a problem in spaces inside the home you rarely see – behind the vanity in the bathroom. If there’s water damage in your home, RestorationElite is a trusted provider of emergency services, mold remediation and water/fire damage repair; they’re located in multiple places around the nation.

Property Cleaning And Leaf Work

Clean your gutters of leaves and debris. While you’re up there (or the professional handyman you hired is) have some water downspouts placed to allow any run-off from the rain to cleanly pour down them and into the street gutters.

For your front and back yards specifically, mulch the leaves to break them up into smaller parts. This saves you a bit of cleanup when compared to raking; furthermore, the mulching motion allows the soil to reabsorb the leaves and nourish your grass this season. If you have a lawn mower, replace the blade with one appropriate for mulching.

Lastly, don’t overlook the importance of winterizing your lawn mower. Any fuel left inside could cause issues if it gets too cold, and possible damage the exhaust. Even if it does not cause damage, it can make the mower more difficult to get running again in the spring. 

Have Your Sewer Line And Sump Pump Checked

Experts generally recommend you check your sump pump pit once every three months or so by pouring water into it. If the pump activates, then you’re okay; if not, then you need to have it looked at. Problems, when they arise, tend to occur after an extended dry season.

It’s a good idea to check your sump pump when the forecast is calling for a rainy season. If there’s any extended work to be done, you’ll probably require a registered professional engineer equipped with small trench boxes they use to safely excavate the ground. They may need to dig to find the problem and ward off an impending failure.

All-in-all, it’s best to have your house checked for all the things that require maintenance; if they fail during the winter season, they’re more costly to repair or replace.

This is a sponsored guest post that may or may not reflect the views and ideals of Mommy Ramblings.


3 Comments

Filed under Home, Home & Garden, sponsored guest post

5 Tips For Your Home Improvement Project

There are many reasons why you might embark on a home improvement project.  Maybe you are the owner of a new house and want to add your personal touch. Perhaps the house you bought was a fixer-upper, and you are ready to start tackling those renovations. Certainly, some homeowners opt for home improvements to increase  the value of their homes. Whatever the reason, here are a few tips to help you with your next home renovation project.

Start With A Detailed Plan

A home improvement project can be complex, and the best way to make it easier is to have a specific plan about what you want to achieve. What is your budget for this renovation project? According to PlumbingFix, whether you want to buy new plumbing fixtures or renovate your kitchen, your plan needs to include a budget.

Are you planning small improvements you can do on your own or will you hire a professional? What is the time line for your home improvement project? When do you want to start? It seems simple enough, but lack of such a plan may back you into a corner. So, think it out and set your thoughts on paper before you begin.

Your Budget

How are you going to fund your home improvement project? While making home improvements are a great way to change the look and feel of your home, you need to be smart when deciding what areas to focus on based on what you can afford. Taking out a loan to cover home improvement expenses is not a wise move in most cases.

If you’re sure you want to move ahead with your home improvement project, set aside some savings in advance to put towards it. This way, you will not end up straining yourself or having to stop the project halfway through because you are over budget. Even if you have adequate funds for your project, being prepared is critical.   

The DIY Option

The trend in home improvement has been leaning heavily towards do-it-yourself projects. One benefit of this is that it will save you on costs. The flip side, however, is that if you are not a professional, you might end up doing more damage than good. If you have set your mind on doing it yourself, then two things will serve you well.

One is to do your research on how to go about it. The second is to make sure you have the proper tools before you start. With the right information in your hands and the professional equipment needed to complete your home improvements, you can do it! However, always start with smaller improvement projects and keep things simple.

Why Hiring A Professional Matters

The type of home improvement contractor you select can either make or break your home improvement project. There are endless cases of people getting scammed by contractors who end up doing a horrible job. To avoid this, spend some time looking for the right contractor. They should be licensed, insured and experienced in doing the type of improvements you want.

Just like you would choose pest control Morristown NJ based experts to eradicate pests, you need a contractor with proven expertise in offering home improvement services to homeowners in your area. A professional ensures a thorough job, offers you great ideas and does the best job based on your budget.

Get Inspiration

Finding inspiration for your home improvement is easy. Look online or go to open houses and see what other homes look like. The bottom line is, with a picture of what you want your home to look like, it’s easier to go ahead with your home improvement project with a little help.

This is a sponsored post, it does not necessarily represent the views and ideals of Mommy Ramblings.

1 Comment

Filed under Home, Home & Garden, New House, sponsored guest post

Is Your Home A Target For Thieves?

The way you keep your home could be making it a target for thieves. While security systems can help, there are a few other ways you can make sure your home is secure against the threat of a burglary.  

Thieves like to window-shop

Can your valuables be seen by people walking by if they look in your windows? Placing expensive collectibles on the windowsill or hanging a flat screen TV opposite a window can make your living room a lucrative target.

You could rearrange these items, or you could find a way to obscure the view into your windows. You may want to consider home window tinting to stop thieves from being able to see in. Alternatively, you could install window treatments like curtains or blinds and make sure you close them at night.  Thin sheers or drapes can be used to stop people from peering in your windows during the day, while still letting in natural light.

Thieves like to work in the dark

If you are lacking exterior lighting around your home, it will be easier for thieves to try to break in at night undetected. Security lighting that is constantly on can consume a lot of electricity as well as, being a nuisance to your neighbors. Instead, choose motion sensitive lighting fixtures that only turn on when someone approaches them.

Tall front hedges also help to hide thieves in the act

Do you have tall hedges or large bushes in front of your home that act like a wall? While they work well to  prevent thieves from peering in your windows, they can also help conceal them when they are in the act of breaking in your home. Beyond that, they will prevent your neighbors from being able to spot a robbery in progress. Consider trimming your hedges and bushes to make it harder for intruders to go undetected. 

Open windows and unlocked doors are a thieve’s best friend

This is an obvious one – leaving windows open or doors unlocked when you go out, will make it easy for thieves to rob your home. Loose hinges on doors or windows are another thing thieves look for, because they provide easy access for them to break-in. Make sure that any damaged windows and doors are fixed. You may even consider adding additional locks to windows and doors for extra security. 

Thieves will check to see if your home is empty

Leaving noticeable signs that your house is empty makes it a tempting target for thieves. Some intruders are so sly that they may monitor your home for a while to get an idea of your weekly routine. By observing your home they can gather important information including how many people live in your house and when everyone leaves to go to work/school. Throw the thieves off by occasionally leaving a TV or radio on or keeping a light on at night. Thieves don’t like noisy or ferocious dogs. Even if you don’t own a dog, hanging a ‘Beware of the Dog’ sign outside can be an effective deterrent.

When you go on vacation, consider having someone house-sit or simply come by every other day to inspect the property. Try not to advertise the fact you’re on vacation by posting it across social media, as this is how many modern thieves find their targets. Posting ‘Off to sunny spain for 2 weeks’ is the worst thing you can do because it tells thieves exactly where you are and how long your house will be empty.

This is a sponsored guest post and does not necessarily reflect the views or ideals of Mommy Ramblings.


2 Comments

Filed under Home, Home & Garden, sponsored guest post